


To successfully use strip eyelash adhesive, you must apply a micro-thin layer of acrylic-based glue to the lash band, wait exactly 30 to 45 seconds for the formula to oxidize and become tacky, and then press the band directly onto your natural lash line, anchoring the center first before securing the outer and inner corners.

From our experience manufacturing and evaluating lash products at sjlashesshop, the single biggest point of failure in any makeup routine is the eyelash glue. You can purchase the most luxurious, handcrafted, mink-like lashes on the market, but if you do not know how to correctly use strip eyelash adhesive, your lashes will lift at the inner corners, slide around your eyelid, or ruin your carefully blended eyeshadow. The beauty industry is flooded with misinformation, with influencers rushing applications and blaming the adhesive for user error.
In most professional situations, makeup artists treat lash application as a science of curing times and placement geometry. If you are struggling with messy applications, watery eyes, or lashes that pop off by midday, you are likely rushing the curing process or using the wrong dispensing method. In this comprehensive guide, we will break down the commercial reality of lash adhesives, explain exactly how they work, and provide you with actionable, expert-level advice on how to use strip eyelash adhesive flawlessly every single time.
Quick Answer: The Golden Rules of Lash Adhesive
- Patience is Mandatory: Never apply wet glue directly to the eyelid. You must wait 30 seconds for the adhesive to cure into a sticky gel.
- Ditch the Squeeze Tube: For commercial users and beginners alike, we recommend brush-on adhesives to prevent flooding the delicate lash band.
- Double-Tap the Corners: The inner and outer edges endure the most muscular tension when you blink. Always apply a secondary micro-dot of glue to these anchor points.
- Placement Angle: Look down into a mirror rather than closing your eye. This stretches the eyelid flat and exposes the true base of your natural lash line.
Table of Contents
- What It Is and How It Works
- Quick Summary Table
- 7 Expert Tips to Use Strip Eyelash Adhesive
- Benefits of Traditional Strip Adhesives
- Limitations and Drawbacks
- Who Should Use It & Who Doesn't Need It
- Pros and Cons Table
- Common Mistakes to Avoid
- Comparison Table: Adhesives vs Alternatives
- Buying Considerations
- Buying Guide Table
- Product Spotlight: sjlashesshop Precision Adhesive
- Expert Recommendation
- Frequently Asked Questions
- Authoritative References
What It Is and How It Works
Understanding what you are putting near your eyes is critical. Strip eyelash adhesive is a temporary, flexible bonding agent designed specifically to adhere synthetic or natural hair bands to the human eyelid. Unlike semi-permanent salon extension glues, which are formulated from rigid cyanoacrylate, traditional strip adhesives are typically water-based acrylic copolymers or latex blends.
How it works is entirely dependent on water evaporation. When you first apply the adhesive to the lash band, it is highly liquid and lacks any holding power. As the formula is exposed to oxygen, the water content begins to evaporate. This chemical reaction causes the acrylic polymers to cross-link, transforming the liquid into a highly tacky, rubberized gel. If you attempt to use strip eyelash adhesive before this cross-linking occurs, the wet liquid will act as a lubricant, causing the lash band to slide around your eyelid and smear your makeup. Once fully cured, the adhesive forms a flexible bond that moves seamlessly with the contraction of your eyelid muscles throughout the day.
Quick Summary Table: Strip Adhesive Chemistry
| Adhesive Type | Base Ingredient | Curing Time (To Tackiness) | Best Use Case |
|---|---|---|---|
| Latex-Based | Natural Rubber Latex | 30 - 45 Seconds | Heavy, thick-banded dramatic lashes. |
| Acrylic-Based (Latex-Free) | Acrylates Copolymer | 20 - 30 Seconds | Individuals with latex allergies; sensitive eyes. |
| Dark Tone Adhesive | Acrylates + Carbon Black | 30 Seconds | Smokey eyes; users who wear heavy black eyeliner. |
| Clear Tone Adhesive | Acrylates Copolymer | 30 Seconds | Natural makeup looks; seamless blending. |
7 Expert Tips to Use Strip Eyelash Adhesive
In our testing and professional application across thousands of clients, we have isolated the exact techniques that guarantee a bulletproof hold. Here are the seven definitive tips you must follow to use strip eyelash adhesive correctly.
1. Master the 30-Second Wait Time
This is the most violated rule in beauty. When you apply the glue, you must wait. We recommend waiting exactly 30 to 45 seconds. The glue must transition from an opaque liquid to a translucent, sticky gel. If you touch the glue with a clean tool and it strings off like melted cheese, it is ready. If it transfers wet liquid to the tool, you must wait longer.
2. Abandon the Squeeze Tube
Squeeze tubes are an outdated, messy delivery system. Squeezing a glob of glue onto a lash band inevitably results in flooding the base of the lash hairs. When you press a flooded band to your eye, the excess glue squishes upward, crusting your natural lashes together. For commercial users and daily wearers, you must switch to a precision brush-on applicator. This allows you to paint a microscopic, even layer exclusively on the spine of the band.
3. Fortify the Anchor Points
The inner and outer corners of your eyes are high-tension zones. Every time you blink, your eye muscles pull against these points. To prevent the dreaded "inner corner lift," apply your standard thin layer of glue across the band, and then add one extra micro-dot of adhesive directly to the absolute tips of both ends.
4. Size Before You Glue
Never apply adhesive to a lash before measuring it against your eye. A strip lash that extends past the outer corner of your eye will drag your eye shape down, making you look tired. A strip that extends too far into the inner corner will poke your tear duct, causing your eye to water, which instantly dissolves the water-based adhesive. Trim the excess from the outer edge first, then apply the glue.
5. The 45-Degree Mirror Technique
Do not close one eye and try to apply the lash blindly. Do not look straight ahead into a mirror, as your natural lashes will block your view of the lash line. Instead, place a hand mirror flat on the table in front of you. Look down into the mirror at a 45-degree angle. This naturally flattens and exposes your eyelid, giving you a clear runway to drop the glued band precisely onto the skin just above your natural lash root.
6. Apply to the Proper Band Geometry
If you are exploring lash strips that look like extensions, you must pay attention to how the band is constructed. For standard application, paint the glue on the bottom and inner curve of the band so it grips both the skin and the root of your natural lash. If you are experimenting with under-lash application (like you would with top DIY cluster eyelash extensions), you must apply the glue strictly to the top edge of the band.
7. The Post-Application "Stamp and Press"
Do not just drop the lash and walk away. Once the band is placed, wait 10 seconds for it to anchor. Then, take a lash applicator tool (or clean tweezers) and gently pinch your natural lashes and the false lash band together along the entire width of the eye. This "stamps" the two layers together, creating a seamless, gap-free blend.
Benefits of Traditional Strip Adhesives
Why do industry purists still prefer traditional strip adhesives over modern magnetic or self-adhesive bands? The primary benefit is absolute placement control and durability. When you correctly use strip eyelash adhesive, you achieve a flush, gap-free bond that magnetic liners often fail to replicate. Furthermore, traditional brush-on adhesives are incredibly lightweight, meaning they do not weigh down the delicate eyelid skin, making them perfect for creating voluminous looks like those found in our mega volume cluster lashes collection.
Limitations and Drawbacks
We believe in practical judgment, which means acknowledging limitations. Traditional strip adhesives are messy if handled incorrectly. They require a steady hand and patience. Furthermore, if you live in extremely humid environments or have highly oily eyelids, standard water-based acrylics can break down prematurely. In these heavy-duty scenarios, you must ensure you are buying a specifically waterproof, latex-free formulation.
Pros and Cons Table: Brush-On Strip Adhesives
| Pros (Why it is worth using) | Cons (The Trade-offs) |
|---|---|
| Provides a secure, 12-to-24-hour hold when applied correctly. | Requires a 30-second waiting period before application. |
| Latex-free formulas are incredibly safe for sensitive eyes. | Can ruin natural lashes if ripped off violently without makeup remover. |
| Brush applicators prevent wasted product and messy tubes. | Requires manual dexterity and practice to master placement. |
| Dries completely clear, hiding minor placement mistakes. | Not suitable for multi-day wear (unlike cluster bonds). |
Who Should Use It & Who Doesn't Need It
Who should use it: Makeup enthusiasts, bridal makeup artists, and anyone wearing traditional full-band strip lashes or anime look lash extensions on a daily basis. If you remove your makeup every single night, traditional daily strip adhesive is your safest and most effective tool.
Who does not need it: If you are looking for a system that lasts for 5 to 7 days, do not use strip adhesive. You need an under-lash bonding system. We highly recommend reviewing our guide on how to apply cluster lashes with bond and seal for multi-day wear. Similarly, if you have severe manual tremors or visual impairments that make handling wet glue impossible, you should pivot to the best magnetic cluster lashes for snap-on ease.
Common Mistakes to Avoid
From our experience auditing client feedback, the most dangerous mistake is improper removal. At the end of the night, never grab the outer corner of the lash and rip it off your eye. This aggressive mechanical force rips your natural lashes out by the follicle. You must saturate a cotton swab with micellar water or an oil-based makeup remover, hold it against the lash band for 15 seconds to dissolve the acrylic bond, and let the false lash slide off effortlessly.
Another commercial mistake is ignoring expiration dates. Liquid adhesives degrade. Once a tube is opened and exposed to air, the copolymers begin to slowly cure inside the bottle. If your adhesive is stringy, clumpy, or smells strongly of ammonia, it is expired and will fail. Replace your adhesive every 3 to 6 months.
Comparison Table: Strip Adhesive vs. Alternatives
| Bonding Method | Application Difficulty | Wear Time | Safety for Natural Lashes |
|---|---|---|---|
| Brush-On Strip Adhesive | Moderate | 12 - 24 Hours | High (if removed properly with oil/micellar water) |
| Magnetic Eyeliner | Low | 8 - 12 Hours | High (No glue pulling on hairs) |
| DIY Cluster Bond & Seal | Moderate to High | 3 - 7 Days | Medium (Requires dedicated chemical remover) |
| Salon Cyanoacrylate Extension Glue | Professional Only | 3 - 6 Weeks | Requires rigorous salon isolation to prevent damage |
Buying Considerations
Not all glues are created equal. When deciding what to buy, you must evaluate the chemical composition. We categorically recommend avoiding latex-based adhesives. Latex is a highly common allergen, and applying it directly to the thin, vascular skin of the eyelid is a massive commercial risk. Always demand a latex-free, formaldehyde-free formula.
Furthermore, decide between clear and dark adhesives. For beginners exploring DIY cluster lashes for beginners or standard strips, clear adhesive is mandatory. It applies white (so you can see where you placed it) and cures completely transparent, forgiving any shaky hand movements. Dark adhesives dry pitch black and are only recommended for heavy-duty applications where you are already wearing thick, liquid black eyeliner.
Buying Guide Table
| Feature to Look For | Why It Matters | Our Recommendation |
|---|---|---|
| Latex-Free Formulation | Prevents severe contact dermatitis and allergic swelling on the eyelid. | Mandatory for all users. |
| Brush-Tip Applicator | Allows for micro-dosing the glue, preventing messy application and crusty lashes. | Highly recommended over squeeze tubes. |
| Waterproof / Water-Resistant | Ensures the bond survives watery eyes, humidity, and sweat during the day. | Crucial for bridal makeup or humid climates. |
| Cruelty-Free / Vegan | Aligns with modern ethical cosmetic standards. | Standard for high-quality commercial brands. |
If you have highly reactive skin, we strongly suggest reading our comprehensive lash glue buying guide and reviewing our detailed lash glue reviews to ensure you select a hypoallergenic formula.
Product Spotlight: The Industry Standard

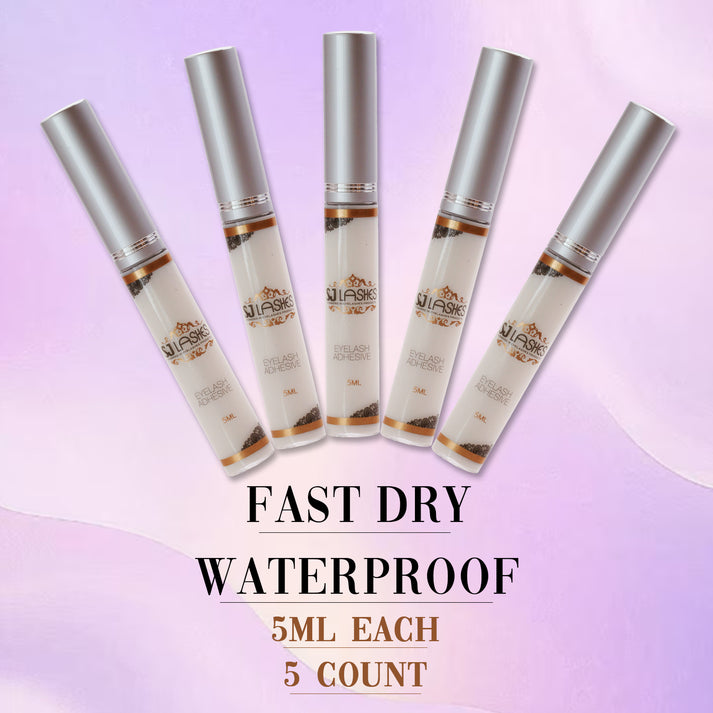
sjlashesshop SJLASHES Precision Brush Strip Lash Adhesive
Engineered for flawless, all-day wear, this latex-free, waterproof formula is the ultimate tool for securing your look. The ultra-fine precision brush guarantees you never apply too much product, ensuring a clean, professional finish every time.
- Recommended For: Strip Lashes and Cluster Lashes
- Color Profile: Applies White, Cures Clear
- Volume: 5ml / 0.17 fl oz
- Curing Time: 30 seconds to optimal tackiness
- Ingredients: Acrylates/Ethylhexyl Acrylate Copolymer, Aqua, Phenoxyethanol (Latex-Free)
- Ethical Standards: Vegan and Cruelty-Free
- Packaging: Silver applicator tube with precision brush
Expert Recommendation
Is it actually worth upgrading your lash adhesive? Yes. In most professional situations, the adhesive is more important than the lash itself. You can make a cheap $3 drugstore lash look incredible if it is locked down flush to the lash line with a premium glue. Conversely, an expensive $30 mink lash will look terrible if it is lifting at the corners because you used a sub-par, expired squeeze tube.
We emphatically recommend throwing away generic tube glues and upgrading to a precision brush-on, latex-free formula like the SJLASHES Precision Brush Strip Lash Adhesive. By following the 30-second tack rule and utilizing the 45-degree mirror technique, you will eliminate application anxiety entirely. For users looking to graduate to more advanced techniques, we suggest checking our lash glue comparison table and exploring the best at home lash extensions for a longer-lasting alternative.
Frequently Asked Questions
How do I know when the eyelash glue is tacky enough?
The visual cue is color. If you are using a clear adhesive, it will apply opaque white. You know it is tacky and ready to apply when the glue begins to turn slightly translucent or iridescent (usually after 30 to 45 seconds). It should feel sticky, not wet and slippery.
Can I use strip eyelash adhesive for individual lash extensions?
You can use it for daily-wear clusters or individuals, but it is strictly a temporary adhesive. It will wash off with water and makeup remover at the end of the day. You cannot use it for semi-permanent extensions designed to last for weeks, as it lacks the rigid cyanoacrylate base required for long-term bonding.
Why are my false eyelashes lifting at the inner corners?
This occurs for three reasons: either you did not wait for the glue to get tacky, the lash band is too long for your eye shape and is poking your tear duct, or you did not apply enough adhesive to the very ends of the band. Always trim your lashes from the outer edge and double-coat the inner corner anchor point with adhesive.
Authoritative References & Industry Standards
To ensure our safety protocols and application standards align with medical and governmental guidelines, we refer to the following authoritative bodies:

