


Updated September 2026 · Written by the SJ LASHES R&D and Education Team ·
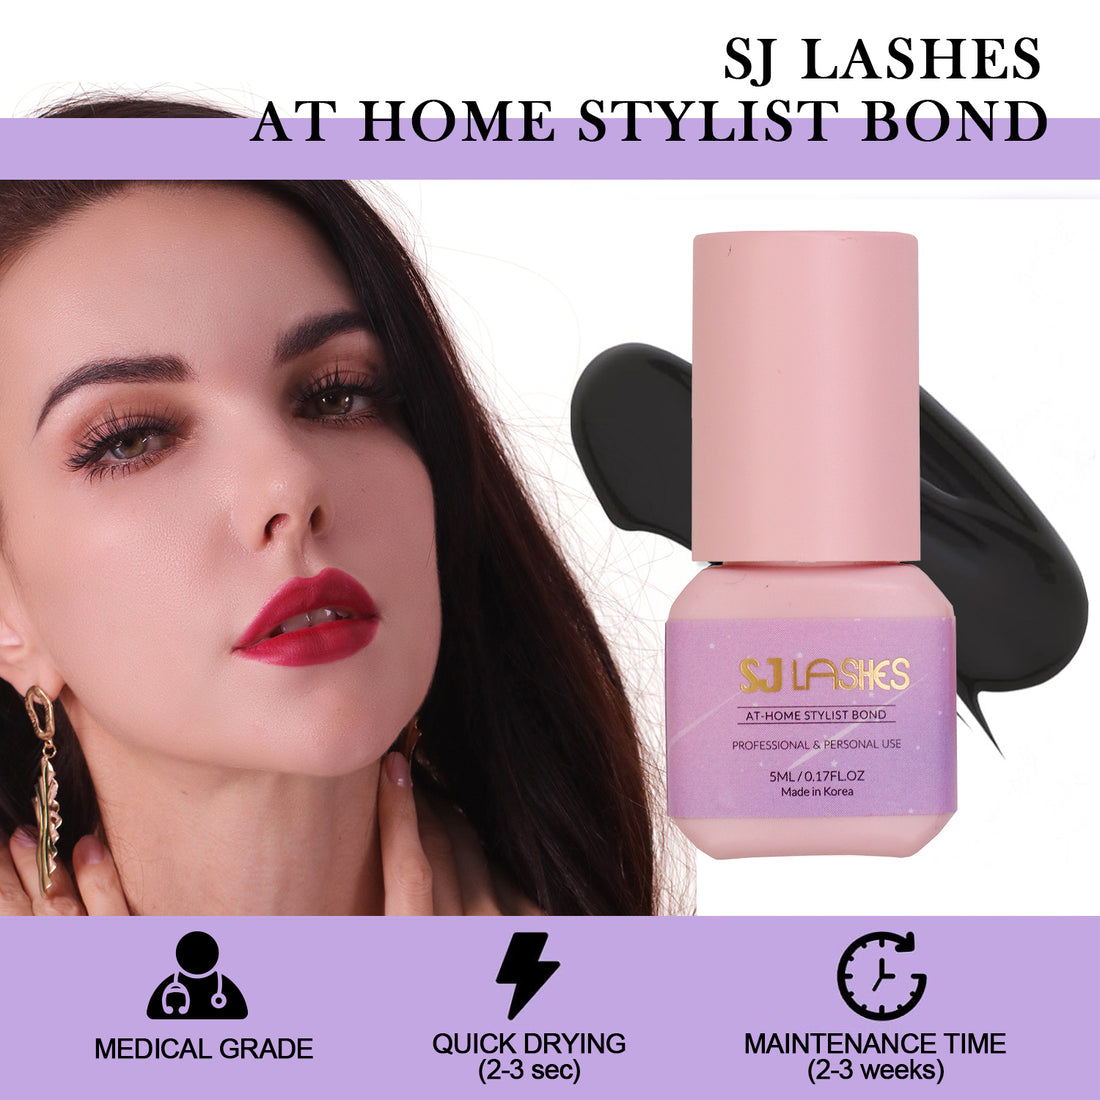
If you have ever sat through a lash appointment with tears running down your face, or found a cluster on your cheek four hours after gluing it on, you already know the secret nobody tells beginners: the lashes are the easy part. The glue decides everything. It decides whether your eyes sting, whether you get three seconds or half a second to place a cluster straight, and whether the set you did on Sunday night is still there on Friday. From our experience as a lash factory and R&D team that hears from thousands of first-time DIY users every month, the wrong adhesive is the number one reason people give up on at-home lash extensions before they ever get good at them.
So for 2026 we did what we wish someone had done for us. We put our own SJ LASHES At-Home Stylist Bond through four real-world retention tests on camera (running water, face cream, liquid foundation and a foaming cleanser), then lined it up against the DIY lash extension glues beginners ask us about most: KISS Falscara, Lashify, Lilac St., FlutterHabit and Ardell, plus two more options from our own factory for daily wear and for all-in-one starter kits. Below you will find a summary table, honest reviews with dry times and realistic wear windows, and a beginner buying guide that explains why some glues burn, why clusters slide, and how to pick the right bottle for your eyes and your calendar.
Whether this is your very first set, you have sensitive eyes and swore off extensions after a bad reaction, or you simply want lashes that survive the gym and the pool, there is an option here for you. Let's get into the 8 best DIY lash extension glues for beginners in 2026. 💜
Table of Contents
- Quick Answer: The Best Lash Glue for Beginners in 2026
- Summary Table: 8 Best DIY Lash Extension Glues Compared
- How We Tested (Water, Cream, Foundation, Cleanser)
- 1. SJ LASHES At-Home Stylist Bond
- 2. SJLASHES Precision Brush Lash Adhesive (Latex-Free, Dries Clear)
- 3. SJLASHES 30D DIY Cluster Lash Kit with Bond and Seal
- 4. KISS Falscara Bond & Seal
- 5. Lashify Whisper Light Bond
- 6. Lilac St. PRO Lash Glue
- 7. FlutterHabit Made For This Adhesive
- 8. Ardell LashTite Individual Adhesive
- Why You Should Never DIY With Salon Glue
- Beginner Buying Guide: Dry Time, Formula, Fumes, Wear Time, Black vs Clear, Bottle Size
- Who Each Glue Is For: 10 Types of Lash Wearers
- How to Apply Cluster Lashes at Home (Step by Step, With Timings)
- 8 Beginner Mistakes That Kill Lash Glue Retention
- Troubleshooting Table: Why Your Cluster Lashes Fall Off
- Real-Life Timelines: Wedding Week, Beach Vacation, Gym Week, Night Shifts
- Build Your First DIY Lash Kit (Three Budgets)
- Safety Notes Every Beginner Should Read
- Frequently Asked Questions
- Watch the Tests in Motion
- Related Reading
- References
Quick Answer: The Best Lash Glue for Beginners in 2026
Short on time? For most beginners, the best DIY lash extension glue of 2026 is the SJ LASHES At-Home Stylist Bond: a medical-grade, hypoallergenic, low-odor black bond with a forgiving 2 to 3 second dry time and up to 2 to 3 weeks of wear. It went through our water, cream, foundation and cleanser tests without a single cluster lifting.
Only want lashes for the day and prefer to take them off at night? The SJLASHES Precision Brush Lash Adhesive is latex-free, dries clear and peels off gently in the evening. Want everything in one box? The SJLASHES 30D DIY Cluster Lash Kit gives you clusters, a dual-ended bond and seal, and tweezers.
Rule of thumb from our team: match the glue to your calendar. One day, one week, or two to three weeks of wear are three different chemistries, and buying the wrong tier is why most beginners think "lash glue doesn't work on me."
Summary Table: 8 Best DIY Lash Extension Glues for Beginners Compared
Wear windows below are what a careful beginner can realistically expect with proper aftercare. Where a number comes from the brand rather than from our own testing, we say so in the review. Individual results vary with your natural lash cycle, skin oiliness and how well you avoid oil around the eyes.
| Rank | Glue | Formula family | Dry or tack time | Realistic wear | Applicator | Best for |
|---|---|---|---|---|---|---|
| 1 | SJ LASHES At-Home Stylist Bond (5 ml, black) | Medical-grade hypoallergenic extension bond, low odor | 2 to 3 seconds | Up to 2 to 3 weeks | Bottle: dip the cluster base or use a micro brush | Beginners who want salon-length wear without the sting |
| 2 | SJLASHES Precision Brush Lash Adhesive (5 ml, dries clear) | Latex-free, water-resistant polymer adhesive for strips and clusters | About 30 seconds to tacky | All day, remove at night | Ultra-fine brush | Daily wearers, strip-lash users moving to clusters, invisible finish |
| 3 | SJLASHES 30D DIY Cluster Lash Kit (bond and seal included) | Dual-ended bond (black) and seal (white) system | Tacky on contact, locked by the seal | All day, stretchable to several days with touch-ups | Dual-ended wand | First-ever set: lashes, glue and tweezers in one box |
| 4 | KISS Falscara Bond & Seal | Acrylate bond plus sealer, biotin and vitamin E | Tacky on contact | 24 hours; up to 10 days with the separate Overnighter | Dual-ended mascara wand | Weekend wear and drugstore convenience |
| 5 | Lashify Whisper Light Bond | Flexible bond free of cyanoacrylate, formaldehyde and latex | Stays tacky, never fully hardens | 5 to 7 days, up to 10 with a sealer | Dual-ended: wand and precision tip | Protecting fine or damaged natural lashes |
| 6 | Lilac St. PRO Lash Glue | Acrylates copolymer bond, dries black | Fast tack | 5 to 10 days | Mascara wand | Multi-day events and humid weather |
| 7 | FlutterHabit Made For This Adhesive | Thick, tacky acrylic bond | 20 to 30 seconds to tacky | Up to 10+ days | Bottle, dip method | Slow, careful placement of pre-mapped segments |
| 8 | Ardell LashTite Individual Adhesive | Fast-drying waterproof adhesive, dark or clear | Fast | Up to 2 weeks | Bottle: pour a drop and dip | Budget individual-lash wear (needs a dedicated remover) |
How We Tested: Water, Cream, Foundation and Cleanser
Marketing words like "strong" and "gentle" are free. Retention under real conditions is not. So instead of describing the At-Home Stylist Bond, we filmed it. Our R&D team applied 30D and 40D heat-bonded clusters with the bond on printed practice cups (a realistic eye printed on a curved surface, which lets us photograph the lash line up close) and on team volunteers, in a normal room-temperature, moderate-humidity setting, the conditions most extension bonds are designed for. Once the bond had fully set, we ran four challenges that copy what your lashes go through in a normal morning.

| Test | What we did | Result |
|---|---|---|
| 💦 Waterproof test | A full minute under running water, then repeated splashing | Passed. Still perfectly in place |
| 🧴 Cream test | A rich face cream massaged directly over the lash line | Passed. No lifting |
| 🎨 Foundation test | Liquid foundation applied with a wand across the cluster bases | Passed. Still strong |
| 🫧 Cleanser test | Foaming lash shampoo worked in with a cleansing brush, then rinsed | Passed. No fall off |
A note on fairness: the four-test protocol was run on our own bond. For the five comparison glues we relied on manufacturer specifications, our team's hands-on application experience, published reviews and the ingredient families each brand discloses. Wherever a wear time is a brand claim rather than something we measured, the review says so. We would rather you trust the numbers than be impressed by them.
Want to see the tests in motion instead of in stills? Every test and tutorial lives on our socials: Instagram, YouTube and TikTok. Click through for more videos. 🎥
1. SJ LASHES At-Home Stylist Bond (Medical Grade, Hypoallergenic, 5 ml)
🏆 Best Overall Lash Glue for Beginners in 2026
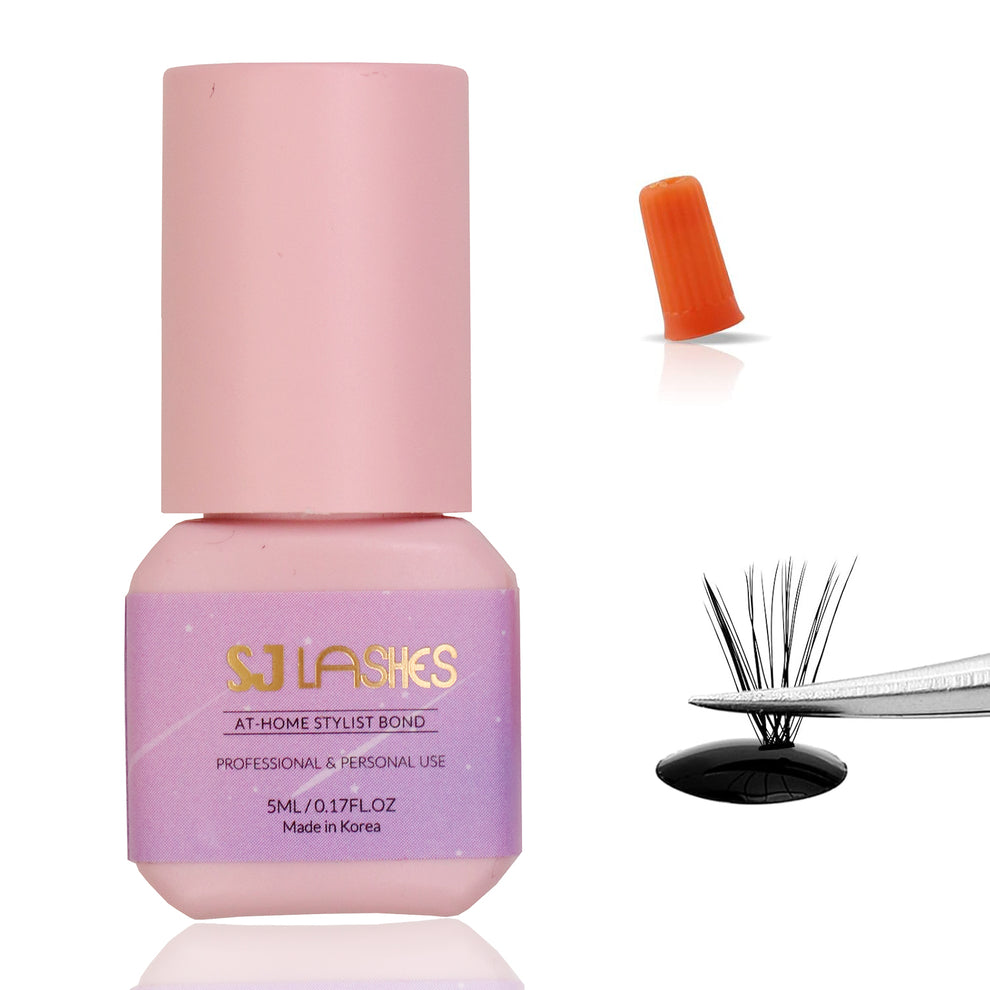
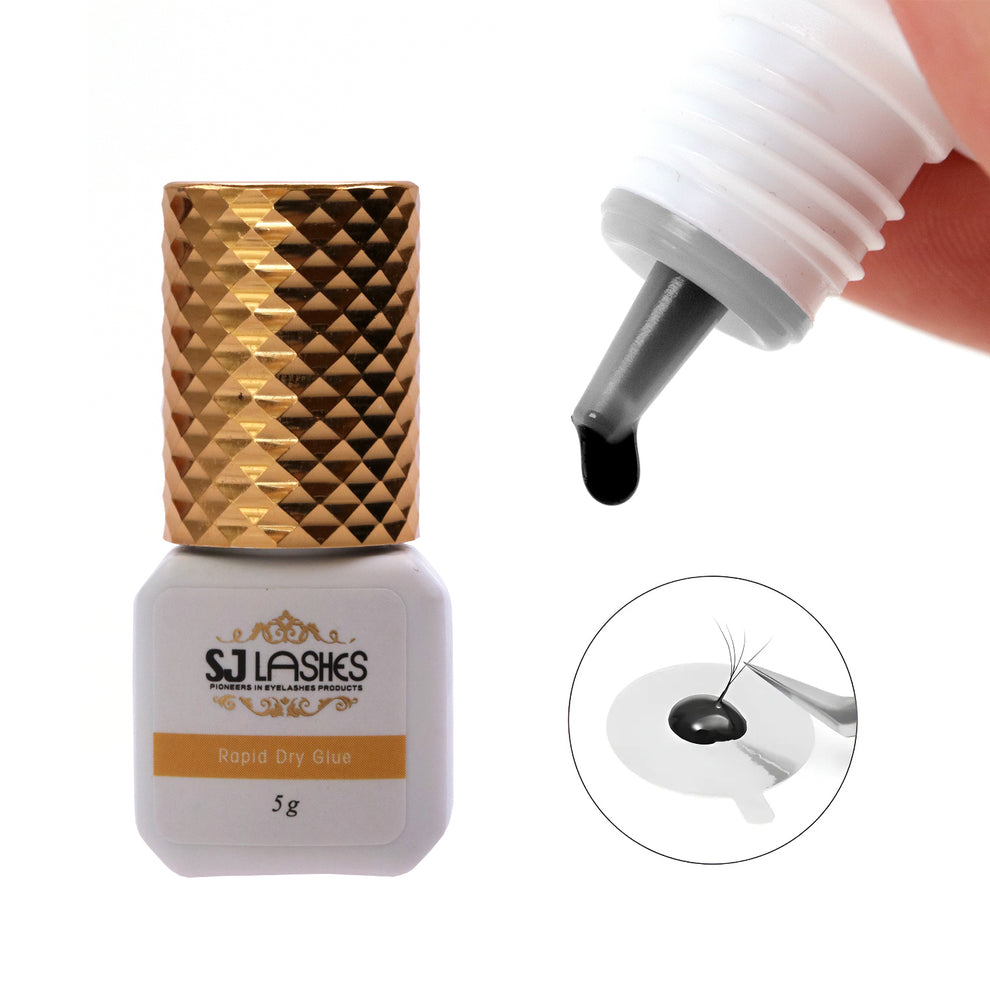
The At-Home Stylist Bond exists because of a gap we kept hearing about. Salon adhesives cure in half a second and release fumes that make open eyes water, so they are useless for self-application. Weekend "bond and seal" glues are gentle but give up after a few days. Home users were stuck choosing between crying and reapplying. Our answer is a medical-grade, hypoallergenic extension bond made in Korea, formulated to be low odor and non-irritating, with the cure deliberately slowed to 2 to 3 seconds so a beginner has time to place a cluster straight, and a hold that lasts up to 2 to 3 weeks with normal aftercare.
- Dry time: 2 to 3 seconds (the beginner sweet spot; more on that in the buying guide)
- Wear window: up to 2 to 3 weeks with proper aftercare
- Color: deep black liquid that blends into the lash line, no clumping, no white residue
- Formula: medical-grade, hypoallergenic, low odor, non-irritating, designed with sensitive eyes in mind
- Made for: cluster lashes and individual lashes; beginners, home users, and lash techs who need a gentler option for reactive clients
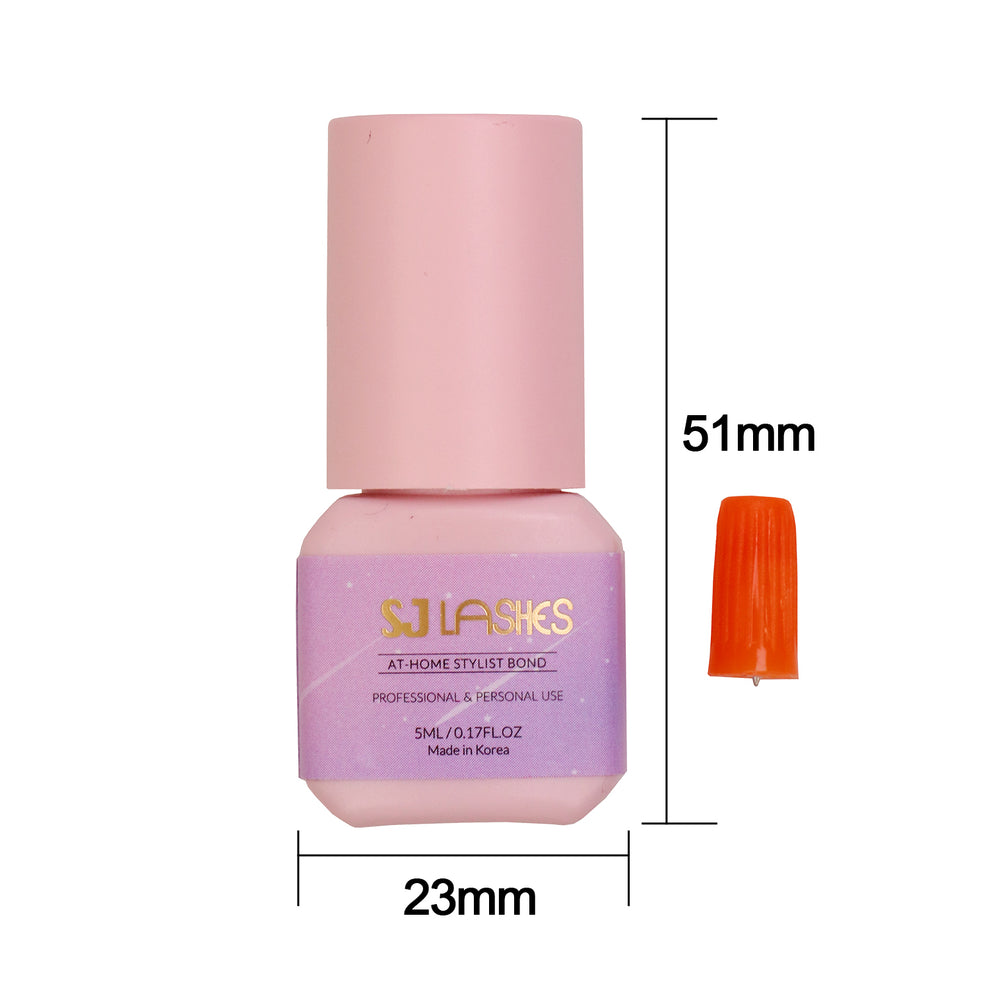
- Size : 5 ml / 0.17 fl oz, slim 51 mm bottle with a needle-nose cap for tiny drops
What beginners notice first is the silence. No sting, no streaming eyes, no holding your breath. What they notice second is control: three seconds is enough time to nudge a crooked cluster into line, but short enough that you are not pinching one cluster for half a minute. In our tests the bond went through running water, face cream, liquid foundation and a foaming cleanser without a single cluster lifting, which is exactly the abuse a two-week set gets from showers, skincare and makeup. The black finish also does something clear glues cannot: it darkens the base of each cluster like a soft tightline, so sparse or mature lash lines look fuller. The first customer reviews to come in, from Mexico, were five stars across the board.

Honest watch-outs, because this is a real extension-strength bond: keep it on the lashes, never on the skin (aim for a 0.5 to 1 mm gap from the lid); patch test 24 to 48 hours before your first full set even though it is hypoallergenic; and remove clusters with a gel remover rather than peeling. The 5 ml size is deliberate. Extension-type bonds perform best in the first weeks after opening, so a big bottle only means money going stale in a drawer. One bottle still covers dozens of full sets.
Pair it with: the Classic Everyday Volume Cluster Lashes (30D to 50D) for a soft first set, the Mega Volume Mastery Clusters (10D to 100D) once you know your map, and the 60-Second Gel Lash Glue Remover for stress-free removal on day 14 to 21.
Shop the At-Home Stylist Bond, ships daily
2. SJLASHES Precision Brush Lash Adhesive (Latex-Free, Waterproof, Dries Clear, 5 ml)
🌤️ Best Lash Glue for Daily Wear and Strip-to-Cluster Beginners

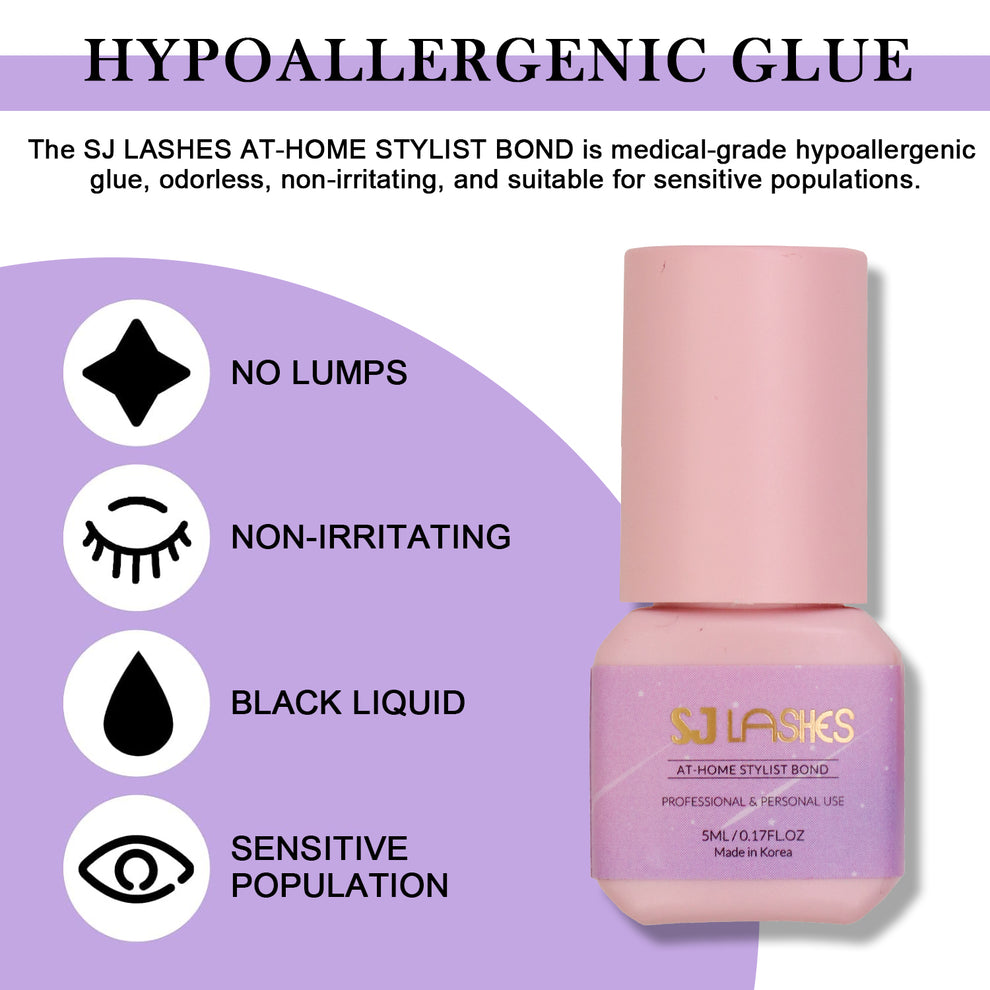
Not everyone wants lashes for two weeks straight. Plenty of people want them for a shift, a date or a photo, and then want them off before bed. For that rhythm an extension bond is overkill, and a latex strip glue is the wrong chemistry for many sensitive users. Our Precision Brush Lash Adhesive sits in between: a latex-free, MSDS-documented formula built for both strip lashes and clusters, with an ultra-fine brush that lets you paint a hairline of product exactly where you want it.
- Finish: goes on white so you can see placement, cures completely clear
- Set time: about 30 seconds to tacky, which is generous enough to reposition a strip or slide a cluster into a gap
- Wear window: all-day, water-resistant hold, then remove gently at night with warm water or a lash-safe remover
- Formula: latex-free, hypoallergenic composition designed for sensitive skin
- Size and price: 5 ml, with 2-, 3- and 5-packs available for multi-bottle savings
Who it is really for: strip-lash veterans who want to try clusters without committing to extension aftercare, brown or colored lash wearers who do not want a black line at the root, and anyone whose skin dislikes latex. The trade-off is honest and simple: a daily adhesive is designed to release, so it will not carry you through a beach week. Choose it for wear time you can count in hours, not weeks.
Shop the Precision Brush Lash Adhesive
3. SJLASHES 30D DIY Cluster Lash Extension Kit with Bond and Seal and Tweezers
🎁 Best All-in-One Starter Kit
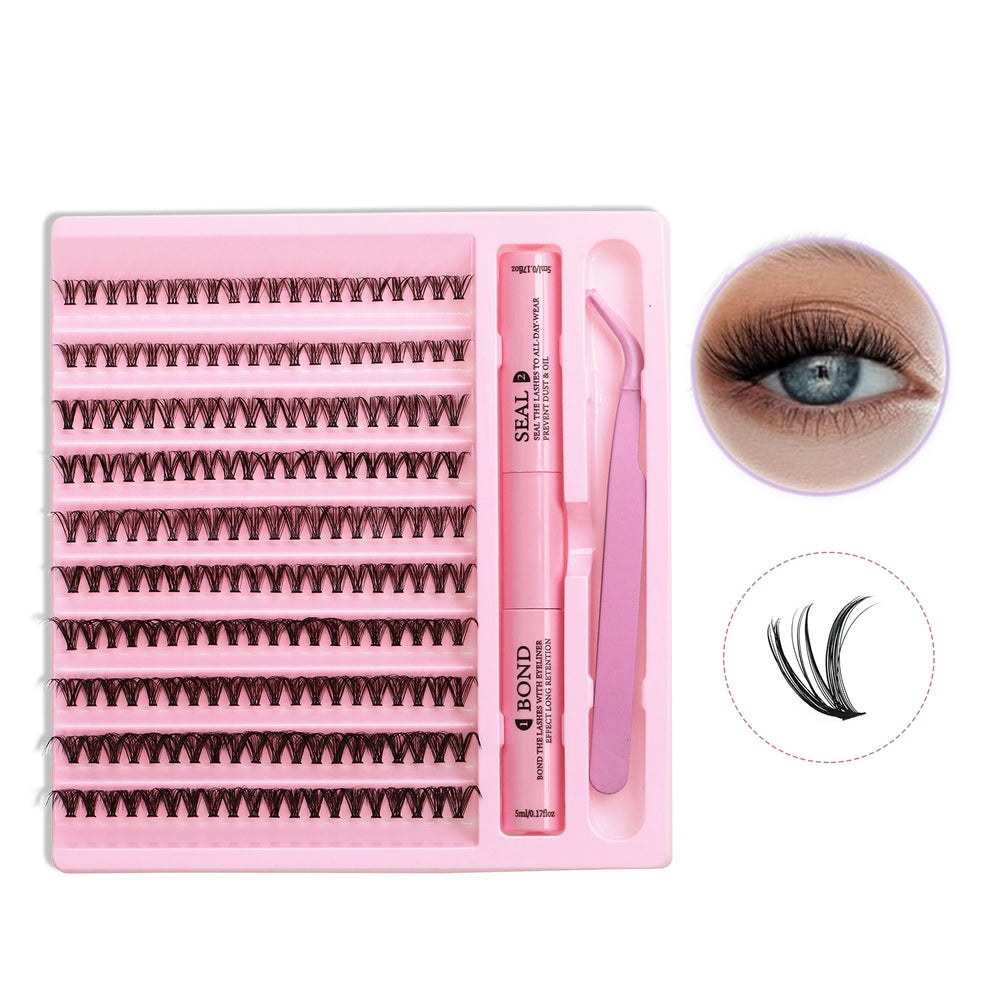
If you have never held a cluster in your life, buying glue, lashes and tweezers separately can feel like homework. This kit removes the guesswork. In one pink tray you get soft 30D heat-bonded clusters in mixed lengths from 8 to 16 mm (so you can build a natural inner-to-outer gradient), a dual-ended adhesive with a black Bond on one end and a white Seal on the other, and an ergonomic applicator tweezer.
Method: three steps. Brush a thin layer of Bond under your natural lashes, place clusters underneath with the tweezers, then swipe the Seal to lock everything and kill the tackiness
- Style: 30D is the density most lash artists recommend for a first set; it reads as "great mascara day" rather than "obviously false"
- Wear window: a bond-and-seal system is designed for comfortable all-day wear, and many users stretch it over several days with the seal step and quick touch-ups; it is a softer hold than the At-Home Stylist Bond by design, which makes it forgiving to learn on and easy to remove
- Want more drama? The 40D Mega Volume version is the same three steps
Our favorite way to use it: learn placement and mapping with the kit's own bond for a week or two, then graduate to the At-Home Stylist Bond when you want a set that lasts until your next salon-free payday. Keep the tweezers; they are the same shape you will use forever.
Shop the 30D DIY Cluster Lash Kit
4. KISS Falscara Bond & Seal
🍀 Easiest Drugstore Entry Point for a Weekend Set
Falscara turned millions of strip-lash users into under-lash cluster users, and the reason is the applicator. The dual-ended tube works like mascara: the bond side (infused with biotin) coats the underside of your natural lashes, you press the wisps into it, and the seal side (with vitamin E) locks everything down and removes the tackiness. Because you brush rather than dip, it is almost impossible to over-apply, which fixes the number one beginner mistake before it happens.
- Dry or tack time: tacky on contact, set by the sealer
- Wear window: designed for 24-hour wear with nightly removal; KISS states up to 10 days when you add the separate Overnighter sealer (brand claim)
- Why beginners like it: forgiving wand application, gentle acrylate formula, available in any drugstore
- Watch out: this is a daily-wear system by design. Reaching multi-day wear requires buying and layering the Overnighter, and even then it is not a two-to-three-week bond. In humid weather the tacky layer can attract mascara flakes and dust, so brushing matters.
Our take: perfect for a first practice weekend or a one-night event, and a good way to learn under-lash placement before you graduate to an extension-grade bond.
5. Lashify Whisper Light Bond
🪶 Gentlest Formula for Fine or Damaged Natural Lashes
Lashify's bond is unusual in this category: it is free of cyanoacrylate, formaldehyde and latex, and it never fully hardens. That flexible, still-tacky bond is the whole point. Because it never becomes rigid, it does not pull on your natural lashes as they grow out, which is why so many former salon clients with thinned-out lashes swear by it. It comes in a dual-ended tube with a wand on one side and a precision tip on the other, and it contains biotin.
- Dry or tack time: stays tacky; the system relies on a separate sealer and a fusing tool to set
- Wear window: users typically report 5 to 7 days, and up to about 10 days with the brand's sealer and careful aftercare
- Why beginners like it: the softest possible hold on fragile lashes, no fumes, a huge library of tutorials
- Watch out: it is a premium ecosystem. To get the advertised results you also need the sealer, the fuse tool and Lashify's own Gossamer lashes, and you are asked to keep the set dry for 24 hours. Cost per wear is the highest on this list.
Our take: the right choice when protecting your natural lashes matters more than budget or wear time. If you love the flexible-bond idea but not the price, the At-Home Stylist Bond is engineered for "strong bonding without excessive rigidity" for exactly that reason.
6. Lilac St. PRO Lash Glue
📅 Best Mid-Tier Wear for Multi-Day Events
Lilac St. built its name on affordable DIY segments, and the PRO glue is the upgrade for people who found the standard version too short-lived. The brand states it lasts up to 10 days, roughly twice the standard formula, thanks to an added acrylates copolymer, and it dries black to blend with the extensions. It applies with a mascara-style wand, which keeps application clean for beginners.
- Dry or tack time: fast tack; brush on, press segments in, seal
- Wear window: up to 10 days per the brand; many users report 5 to 7 days in practice, which is still excellent for a wand-applied bond
- Why beginners like it: dries black for a soft tightline effect, inexpensive refills, works in humid weather
- Watch out: it is optimized for Lilac St.'s own segments and works best inside that system. Ten days is the ceiling, not the average, and it still sits well short of an extension-grade two-to-three-week bond.
Our take: a good pick for a bachelorette weekend or a three-day conference. If you want the same black-blending finish with a longer runway, that is exactly the job the At-Home Stylist Bond was built for.
7. FlutterHabit Made For This Adhesive
🐢 Slowest Tack Time for Careful, Deliberate Placement
FlutterHabit's adhesive is thick and deliberately slow. You apply a bead, wait 20 to 30 seconds for it to turn tacky, then press the pre-mapped segment into place. For some beginners that wait is a gift: you are never rushed, and the segments can be nudged repeatedly before they set. The brand advertises up to 10-plus days of wear.
- Dry or tack time: 20 to 30 seconds to tacky, longer to full cure
- Wear window: up to 10-plus days per the brand; independent retailers and reviewers more often describe around 5 to 7 days
- Why beginners like it: the most forgiving placement window on this list, pairs beautifully with pre-mapped strips
- Watch out: the glue is sold separately from the lashes, you are asked to keep the set dry for 24 hours, and thick formulas are easy to over-apply, which is the leading cause of white residue and lifting. A slow set also means a long, careful session for a full set.
Our take: ideal if you know you like to take your time. If you would rather finish a full set in 15 minutes, a 2 to 3 second bond gets you there faster with the same margin for error.
8. Ardell LashTite Individual Adhesive
💵 Budget Legacy Pick for Individual Lashes
Ardell's LashTite has been on beauty-counter shelves for decades and remains one of the cheapest ways to wear individual lashes for more than a day. It is waterproof, comes in dark or clear, and the brand advertises up to 2 weeks of wear. You pour a small drop onto a surface, dip the knot of each individual lash and place it.
- Dry or tack time: fast
- Wear window: up to 2 weeks per the brand
- Why beginners like it: extremely affordable, widely available, works with any individual or knot-free lash
- Watch out: LashTite is a traditional individual-lash adhesive rather than a modern hypoallergenic extension bond. It carries no medical-grade or hypoallergenic positioning, the dark shade can show on lighter or brown lashes, some listings quote a very long full-cure time, and Ardell sells a dedicated LashFree remover because it is not meant to be peeled off.
Our take: a fine budget option if you already own it, but for a few dollars more a low-odor, hypoallergenic bond is a far kinder introduction for sensitive eyes.
Why You Should Never DIY With Salon Glue
Every week someone asks us whether they can just buy the professional bond lash artists use, since it lasts 6 weeks. Please do not. Professional cyanoacrylate adhesives such as our own Eyelash Extension Glue cure in 0.5 to 1 second and hold for 40 to 50 days, and they achieve that with a fast, high-fume chemistry that is only safe when the client's eyes are closed and taped for the entire appointment. Applying it to yourself means your eyes are open, blinking and a few centimeters from the vapor. That is the recipe for the burning, redness and streaming eyes that give lash glue a bad name, and a cluster that sets crooked in half a second cannot be fixed. Even professional adhesives marketed as "sensitive" formulas, such as Stacy Lash Sensitive, carry a label that says professional or salon use only and not for self-application, clusters or strips. Leave salon bonds to certified professionals and pick a formula whose speed and fume level were designed for open eyes.
Beginner Buying Guide: How to Choose a DIY Lash Extension Glue in 2026
Dry time: why 2 to 3 seconds is the beginner sweet spot
Adhesive speed is a spectrum. Salon bonds at 0.5 to 1 second give you zero room for error. Bond-and-seal systems stay tacky until you seal them, which is forgiving but also means the hold is softer. A 2 to 3 second cure is the middle ground our education team has settled on after watching hundreds of first sets: long enough to straighten a cluster, short enough that the bond sets before your eye waters or you blink it off. Anything slower than about 30 seconds means a full set takes a long time and the glue is more likely to be over-applied while you wait.
Formula families: what "hypoallergenic" and "low fume" actually mean
Most long-wear lash bonds are built on cyanoacrylate, the same adhesive family used in skin closure products, tuned for flexibility. The irritation people associate with lash glue is largely about vapor: as cyanoacrylate cures it releases fumes, and dermatology case reports have documented allergic contact dermatitis from both the adhesive itself and from formaldehyde released as it breaks down. Modern medical-grade formulas reduce that vapor load and use purified, lower-odor chemistry, which is what "low fume" and "hypoallergenic" describe. One honest caveat: the FDA notes there is no federal legal definition of "hypoallergenic," so the word is only as good as the manufacturer's testing behind it. That is why we publish our own tests, ship a 5 ml bottle that gets used while fresh, and still ask you to patch test. Latex is a separate allergen found in many old-fashioned strip glues, which is why both of our daily and long-wear formulas are latex-free.
Wear time: match the glue to your calendar
- 1 day: a daily adhesive like the Precision Brush Lash Adhesive or KISS Falscara. Gentle, releases easily, remove every night.
- 3 to 10 days: bond-and-seal systems (Falscara with Overnighter, Lilac St. PRO, FlutterHabit, Lashify). Soft hold, some upkeep, 24 dry hours often required.
- 2 to 3 weeks: an extension-grade home bond such as the At-Home Stylist Bond. Sets in seconds, survives water and skincare, needs a remover at the end.
- 4 to 6 weeks: salon-only professional adhesives applied by a certified artist with eyes closed.
Black vs clear glue
Black glue hides the attachment point and visually thickens the lash line, so it flatters sparse, blonde or mature lashes and anyone who wears eyeliner. Clear glue is the choice for brown or colored clusters, spiky anime-style sets, and people who dislike any hint of a line. From our experience clear formulas punish over-application more, because excess product can turn white after a shower, so dip only the base of the cluster.
Bottle size and freshness
Extension bonds react with moisture in the air, so they thicken and slow down over time once opened. A 5 ml bottle covers dozens of full DIY sets and is finished while it still performs. Store it upright, cap tight, in a cool dry drawer, and do not keep it in the bathroom where steam lives.
Applicator
Wands are the easiest for absolute beginners, because they meter the product for you. Bottles with a needle-nose cap give better control once you have a few sets under your belt: pour one small drop onto a glue ring or a piece of foil, dip the cluster base, and place. Disposable micro brushes let you paint bond on a single stubborn corner without redipping.

Who Each Glue Is For: 10 Types of Lash Wearers
| You are… | Your real problem | What we would hand you |
|---|---|---|
| A total first-timer | Do not know what to buy or how to start | The 30D DIY Cluster Lash Kit, then the At-Home Stylist Bond once placement feels natural |
| Sensitive or watery eyes | Glue fumes make you tear up, which ruins the bond | The low-odor, hypoallergenic At-Home Stylist Bond, applied under a fan, after a patch test |
| A busy mom or nurse | No time for salons or nightly reapplication | A 2 to 3 week bond so you apply once and forget, plus the gel remover for a painless reset |
| A gym-goer or swimmer | Sweat, chlorine and daily showers loosen everything | A waterproof extension-grade bond and an oil-free routine; see the gym-week timeline below |
| A bride or bridesmaid | Needs lashes that survive tears, hugs and a honeymoon | At-Home Stylist Bond applied two days before, with pre-mapped cat-eye clusters |
| Oily eyelids | Clusters slide within days no matter the brand | Prep with lash primer, use a black extension bond, skip creamy eye products |
| Mature or sparse lashes | Few anchor lashes, want a fuller-looking line | Lightweight 10D to 30D clusters with a black bond that doubles as a tightline |
| A daily strip-lash wearer | Latex glue irritates, strips lift at the corners | The latex-free Precision Brush Lash Adhesive, which also works for a few daytime clusters |
| Someone who reacted to salon glue before | Swelling or itching after professional extensions | Talk to your doctor first. If cleared, patch test a low-fume bond; if you are still unsure, choose glue-free press-on or magnetic lashes instead |
| A new lash tech or mobile artist | Clients with reactive eyes, or practice at home on yourself | At-Home Stylist Bond as your gentle-client option, professional glue for standard sets, anti-static tweezers for both |
How to Apply Cluster Lashes at Home With Lash Glue (Step by Step, With Timings)
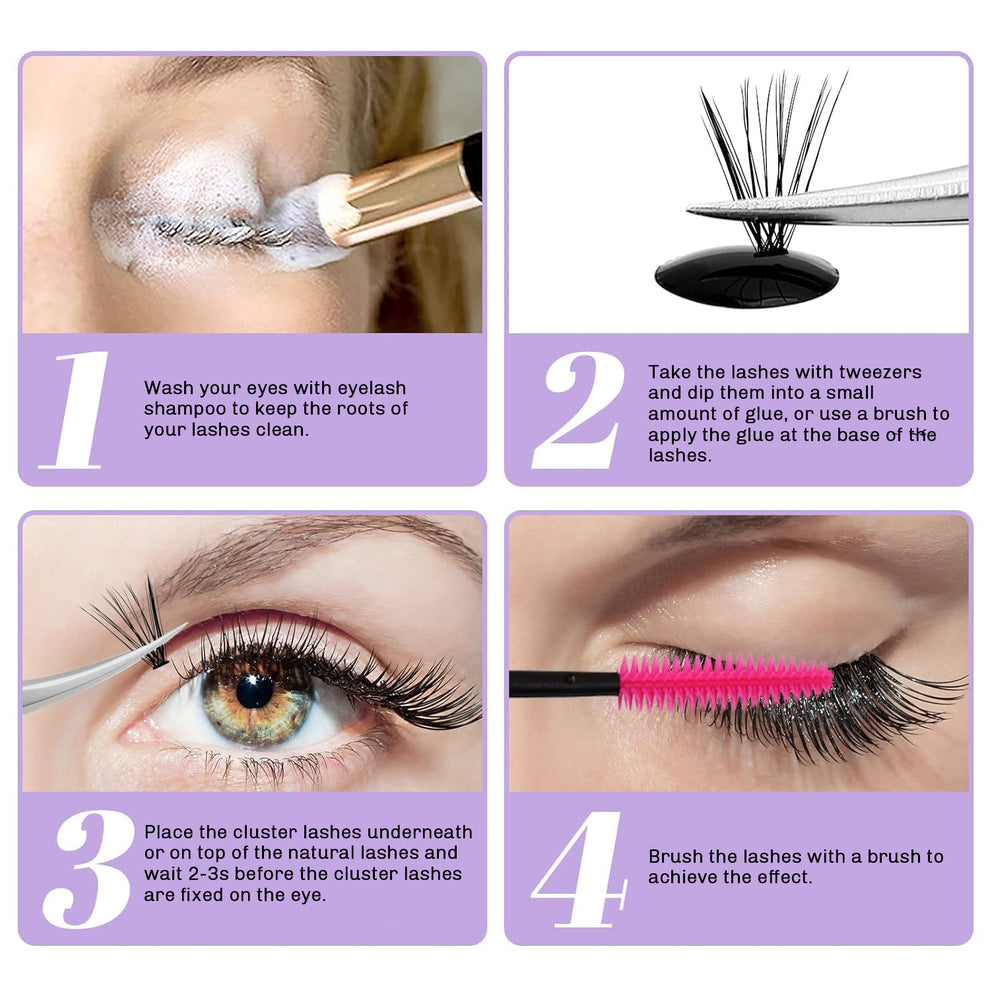
Total time for a first full set: 20 to 30 minutes. After three or four sets most people are done in 10 to 15.
- Patch test (48 hours before your first set, 2 minutes). Place one cluster on the outer corner of each eye, or a dot of bond behind the ear, and wait 24 to 48 hours. No itching, swelling or redness means you are good to go.
- Cleanse (3 minutes). Wash lashes with an oil-free lash shampoo or foaming cleanser, rinse, and let them dry completely. Oil, mascara residue and skincare are the number one cause of early fall-off.
- Prime (1 minute, optional but recommended for oily lids). Swipe a tiny amount of lash primer along the natural lashes and let it flash off. Primer removes invisible oils and can noticeably extend retention.
- Set up (2 minutes). Pour one small drop of At-Home Stylist Bond onto a glue ring or foil. Lay out your clusters by length: 8 to 10 mm for the inner corner, 11 to 13 mm through the middle, 14 to 16 mm on the outer third for a soft cat-eye. Have a spoolie and tweezers within reach.
- Dip (2 seconds per cluster). Grip the cluster with tweezers near its base and touch only the bottom 1 to 2 mm into the glue. You want a tiny bead, not a coating.
- Place and hold (2 to 3 seconds per cluster). Looking down into a mirror placed below eye level, slide the cluster under your natural lashes (or on top, if you prefer) so the base sits 0.5 to 1 mm from the lid, never touching skin. Hold gently for 2 to 3 seconds. Start at the outer corner and work inward, alternating eyes so both stay symmetrical.
- Blend (1 minute). Once every cluster is placed, brush upward with a clean spoolie to merge natural and false lashes. If a cluster is crooked, this is your last chance to nudge it before full cure.
- Cure (the rest of the day). Keep the set dry and steam-free for the first 24 hours: no hot showers on your face, no sauna, no crying films. After that, shower and wash as normal.

Under-lash or on top? Under-lash placement (the "underlash look") hides the base completely and feels the most natural, and it is what the Bond and Seal kits are designed for. Top placement is slightly easier to see in the mirror and works well for heavier clusters. Both work with the At-Home Stylist Bond; pick whichever your hands find easier and stay consistent within one set.
8 Beginner Mistakes That Kill Lash Glue Retention
- Dipping the whole cluster. More glue is weaker glue: thick blobs cure unevenly, stay flexible in the middle and peel as one piece. Base only.
- Skipping the cleanse. Yesterday's mascara and this morning's moisturizer form a film the bond cannot grip.
- Placing on the skin. Glue on the eyelid irritates, itches and pops off with the first blink. Keep a hair's breadth of gap.
- Rushing the cure. Steam within the first 24 hours is the classic reason a perfect set is gone by day three.
- Oil-based skincare and makeup remover. Oils dissolve adhesive polymers. Switch to oil-free formulas around the eyes while you wear extensions.
- Sleeping face-down. Friction on the pillow tears clusters out along with natural lashes. Back sleeping, or a silk pillowcase, adds days.
- Picking instead of removing. Peeling clusters off pulls out natural lashes. Use a gel remover, which dissolves the bond in 60 to 180 seconds.
- Using stale glue. If the bond has thickened or strings between the cap and bottle, it will not hold. Replace it and store the new bottle away from humidity.
Troubleshooting Table: Why Your Cluster Lashes Fall Off
| Symptom | Most likely cause | Fix |
|---|---|---|
| Clusters fall off within 24 hours | Oily or unwashed lashes, or steam during the cure window | Cleanse, prime, and keep the set dry for a full day |
| Eyes sting or water during application | Fumes from a fast salon-type glue, or too much product | Switch to a low-odor home bond, use less, run a small fan across (not into) your face |
| White crust at the base | Over-application or moisture hitting uncured glue (blooming) | Dip the base only; wait 24 hours before water |
| Clusters point in different directions | Glue set before you finished positioning | Use a 2 to 3 second bond and place the base first, then let the tip settle; brush at the end |
| Sticky feeling or lashes stuck together | Bond-and-seal system left unsealed, or clusters glued to each other | Apply the seal step; separate with a spoolie while the bond is still fresh |
| Itchy, red or swollen lid | Glue touching skin, or an allergic reaction | Remove with gel remover, stop use; if it persists or swelling is significant, see a doctor |
| Great for a week, then a sudden shed | Natural lash growth cycle, not the glue | Normal: adults shed a few lashes daily. Do a 5-minute infill on day 10 to 14 |
| Glue became thick or stringy | Humidity exposure or a bottle open too long | Replace it; store upright, capped, away from the bathroom |
Real-Life Timelines: Wedding Week, Beach Vacation, Gym Week, Night Shifts
Wedding week
Apply on Wednesday evening for a Saturday wedding. That gives the bond two full days to reach maximum strength before tears, hugs and 400 photos, and leaves Thursday for a calm touch-up if a corner cluster is not perfect. Choose a pre-mapped cat-eye or wispy map, and skip lash serums and eye creams for the week. The set will still be there for the honeymoon; pack the gel remover for the flight home.

Beach or pool vacation
Apply 48 hours before departure so the cure is complete before salt water and sunscreen arrive. Rinse lashes with fresh water after every swim, use an oil-free sunscreen around the eyes, and brush with a spoolie each morning. Expect a light natural shed by day 10 to 12; a five-minute infill with three or four clusters per eye restores the look.

Gym week
Sweat itself is not the enemy; salt residue and towel friction are. Blot, never rub, and rinse lashes with water after training. Wash hair with your head tilted back so conditioner does not run through the lash line. With this routine our team members regularly get the full 2 to 3 weeks from one application.

Night shifts and early starts
For nurses, flight crews and anyone who is up before the mirror is, the whole point of a 2 to 3 week bond is zero morning maintenance. Apply on a day off, sleep on your back the first night, and enjoy waking up done.

Build Your First DIY Lash Kit (Three Budgets)
Orders over $69 ship free, and a 10 percent first-order discount is available through the newsletter sign-up, so most of these bundles land well below what a single salon fill costs.
| Bundle | What is inside | |
|---|---|---|
| Starter | ||
| Retention | At-Home Stylist Bond + Lash Primer + 60-Second Gel Remover + Anti-Static Tweezers 6-Piece Set | |
| Complete ( ships free) | 2 × At-Home Stylist Bond + Primer + Gel Remover + Classic Everyday Volume Clusters + Mega Volume Mastery Clusters + Tweezers + Spoolies |
Prefer one box that already has everything? The SJ LASHES DIY Professional Lash Extension Kit bundles multi-style clusters from 10 to 16 mm with a dual-ended bond and seal and a remover, and the Complete DIY Eyelash Extension Kit (30D and 40D) adds waterproof adhesive, remover and tools. Browse all lash kits and bundles or the full glue and liquids collection.
Start with the At-Home Stylist Bond
Safety Notes Every Beginner Should Read
- The FDA classifies false eyelashes, eyelash extensions and their adhesives as cosmetics, and reminds users that the eyelids are delicate and that irritation or injury in the eye area "can be particularly troublesome." Read the ingredient list before you use any adhesive.
- The American Academy of Ophthalmology advises asking for the glue's ingredient list, checking the expiration date, and doing a spot test on the skin before a full application. We agree, and we ask you to patch test even our hypoallergenic bond.
- Never apply any adhesive if you have an eye infection, a stye, or inflamed eyelids, and wash your hands and tools before every set.
- Stop immediately if you feel burning, itching or swelling. Remove the set with a gel remover and see a doctor if symptoms persist. If a reaction is severe, do not attempt removal yourself; see an ophthalmologist.
- All lash adhesives are for external use only. Keep them away from children and store them capped in a cool, dry place.
Frequently Asked Questions About DIY Lash Extension Glue
What is the best lash glue for beginners?
For most people it is a low-odor, hypoallergenic home bond with a 2 to 3 second dry time, such as the SJ LASHES At-Home Stylist Bond. That speed gives you time to place each cluster correctly, and the reduced fumes keep your eyes from watering. If you only want lashes for the day, a latex-free daily adhesive like the Precision Brush Lash Adhesive is simpler.
How long does DIY lash extension glue last?
It depends on the formula tier. Daily adhesives last a day, bond-and-seal systems typically 3 to 10 days, and extension-grade home bonds like the At-Home Stylist Bond up to 2 to 3 weeks with proper aftercare. Salon adhesives last 4 to 6 weeks but are not safe for self-application.
Why do my cluster lashes fall off so fast?
The usual suspects are oily or unwashed natural lashes, glue that got wet in the first 24 hours, oil-based skincare, sleeping face-down, or a glue that was simply designed for shorter wear. Work through the troubleshooting table above; nine times out of ten the fix is prep and cure time, not a stronger glue.
Is lash glue safe for sensitive eyes?
Modern low-fume, hypoallergenic bonds are designed for sensitive users, and many people who cried through salon appointments wear them comfortably. Because sensitivities are individual, always patch test 24 to 48 hours ahead and keep glue off the skin. If you have had a documented allergy to lash adhesive, ask your doctor first or consider glue-free press-on or magnetic lashes.
Can I shower with cluster lashes?
Yes, after the first 24 hours. Avoid steaming your face or directing hot water at your eyes during the cure window; after that, normal showers are fine. We wrote a full guide: Can I Shower With Lash Extensions After 24 Hours?
Black or clear lash glue: which is better for beginners?
Black is more forgiving visually because it blends into the lash line and hides small placement gaps. Clear is better for brown, colored or spiky lashes, but shows white residue if you over-apply. Beginners who wear black clusters should start with black.
Can I use the At-Home Stylist Bond on strip lashes?
It is designed for clusters and individual lashes. For strips, use a strip-specific adhesive such as the Precision Brush Lash Adhesive, which is made to release gently at the end of the day.
How do I remove DIY lash extensions at home without losing my natural lashes?
Apply a gel remover along the bond line with a micro brush, wait 60 to 180 seconds, and slide the clusters off with a spoolie or tweezers. Never peel. Rinse with warm water, then cleanse. Our 60-Second Gel Lash Glue Remover is odorless and stays where you put it.
Do I need lash primer?
Not strictly, but if you have oily lids or your sets keep failing early, primer is the single cheapest upgrade. It strips residual oil so the bond can grip the lash cuticle. Use a tiny amount on the lashes only, keep it off the skin and out of the eyes, and let it dry before gluing.
How much glue do I need per set, and how many sets does a 5 ml bottle cover?
One small drop, about the size of a lentil, is enough for a full set of 20 to 30 clusters. A 5 ml bottle covers dozens of full sets, which is why we sell 5 ml instead of 10: you finish it while it is fresh.
Can lash techs use the At-Home Stylist Bond on clients?
Yes. It is labelled for professional and personal use, and many artists keep it as their gentle option for clients with reactive eyes or for light cluster and hybrid sets. For classic and volume sets with 6-week retention goals, a professional adhesive applied with eyes closed remains the standard.
What temperature and humidity should I apply in?
Around 20 to 25 °C and 45 to 60 percent humidity is comfortable for most bonds. Very dry rooms slow the cure; very humid bathrooms speed it up and can cause shock-curing (a brittle, white bond). A bedroom with a small fan is usually ideal.
Watch the Tests in Motion 🎥
Want to see the water, cream, foundation and cleanser tests as a video, plus a full under-lash application in real time? We post every test, tutorial and lash map on our socials. Click through and say hi:
- Instagram: @sjlashesshopcom
- YouTube: @sjlashesshopcom
- TikTok: @sjlashesdiary
- Facebook: @sjlashesshopcom
- Pinterest: sjlashesshop
Questions about your specific eye shape or a reaction you had in the past? Message us on WhatsApp at +1 863 390 6092 or through our contact page, and a member of the education team will answer personally.
Related Reading
- 6 Strongest Cluster Lash Glues Tested: The Ultimate 2026 Guide
- 10 Best Lash Cluster Glue for Sensitive Eyes: An Expert Guide
- Pre-Glued Lash Clusters for Beginners: 7 Mistakes to Avoid
- 8 Best Strip Lash Glues for Beginners and Sensitive Eyes: The Ultimate 2026 Guide
- 100D vs 200D Lash Clusters: The Ultimate 2026 DIY Lash Mapping Guide for Beginners
- The 10 Best Eyelash Clusters for Almond Eyes: An Expert Lash Mapping Guide
- 10 Best Lashes for Sensitive Eyes and Glue Allergies: The Ultimate 2026 Guide (No Glue)
- Can I Shower With Lash Extensions After 24 Hours? The Definitive Industry Truth
References
- U.S. Food and Drug Administration. Eye Cosmetic Safety. fda.gov/cosmetics/cosmetic-products/eye-cosmetic-safety
- U.S. Food and Drug Administration. "Hypoallergenic" Cosmetics. fda.gov/cosmetics/cosmetics-labeling-claims/hypoallergenic-cosmetics
- American Academy of Ophthalmology. Eyelash Extension Facts and Safety. aao.org/eye-health/tips-prevention/eyelash-extension-facts-safety
- Occupational allergic contact dermatitis caused by eyelash extension glues. Contact Dermatitis. 2012 (case reports; PubMed PMID 23039004). pubmed.ncbi.nlm.nih.gov/23039004
- Shanmugam S, Wilkinson M. Allergic contact dermatitis caused by a cyanoacrylate-containing false eyelash glue. Contact Dermatitis. 2012;67(5):309-310 (PubMed PMID 23039005). pubmed.ncbi.nlm.nih.gov/23039005
- Systematic review of allergic contact dermatitis associated with 2-hydroxyethyl methacrylate and ethyl cyanoacrylate in cosmetic glues used for nail, eyelash and hair extensions. 2022 (PubMed PMID 35184294). pubmed.ncbi.nlm.nih.gov/35184294
- Cosmetic Ingredient Review (CIR). Independent safety assessments of cosmetic ingredients. cir-safety.org
- SJ LASHES internal retention testing, September 2026: running-water, face-cream, liquid-foundation and foaming-cleanser challenges on 30D and 40D heat-bonded clusters applied with At-Home Stylist Bond.
Disclaimer: this article is educational and reflects our team's manufacturing experience and testing. It is not medical advice. Competitor information is drawn from publicly available product descriptions and reviews as of September 2026 and may change; brand names belong to their respective owners.

